App Store Connect Setup
Last updated: January 24, 2026
Follow these steps to connect your iOS app. This guide will walk you through creating an App Store Connect API key and uploading it to our system.
💡 Visual guides included! Each step below includes screenshots that show exactly where to click. Follow along with the visual guides as you complete each step.
Read-only access
We use your App Store Connect API key to retrieve financial reports and app information. We will never modify, update, or delete anything in your App Store Connect account.
Before You Start
Make sure you have:
- •Access to your App Store Connect account
- •Admin or App Manager role in App Store Connect
- •Your Vendor number (found in Payments and Financial Reports)
Create an App Store Connect API Key
First, we need to create an API key in App Store Connect that allows us to access your app's financial data.
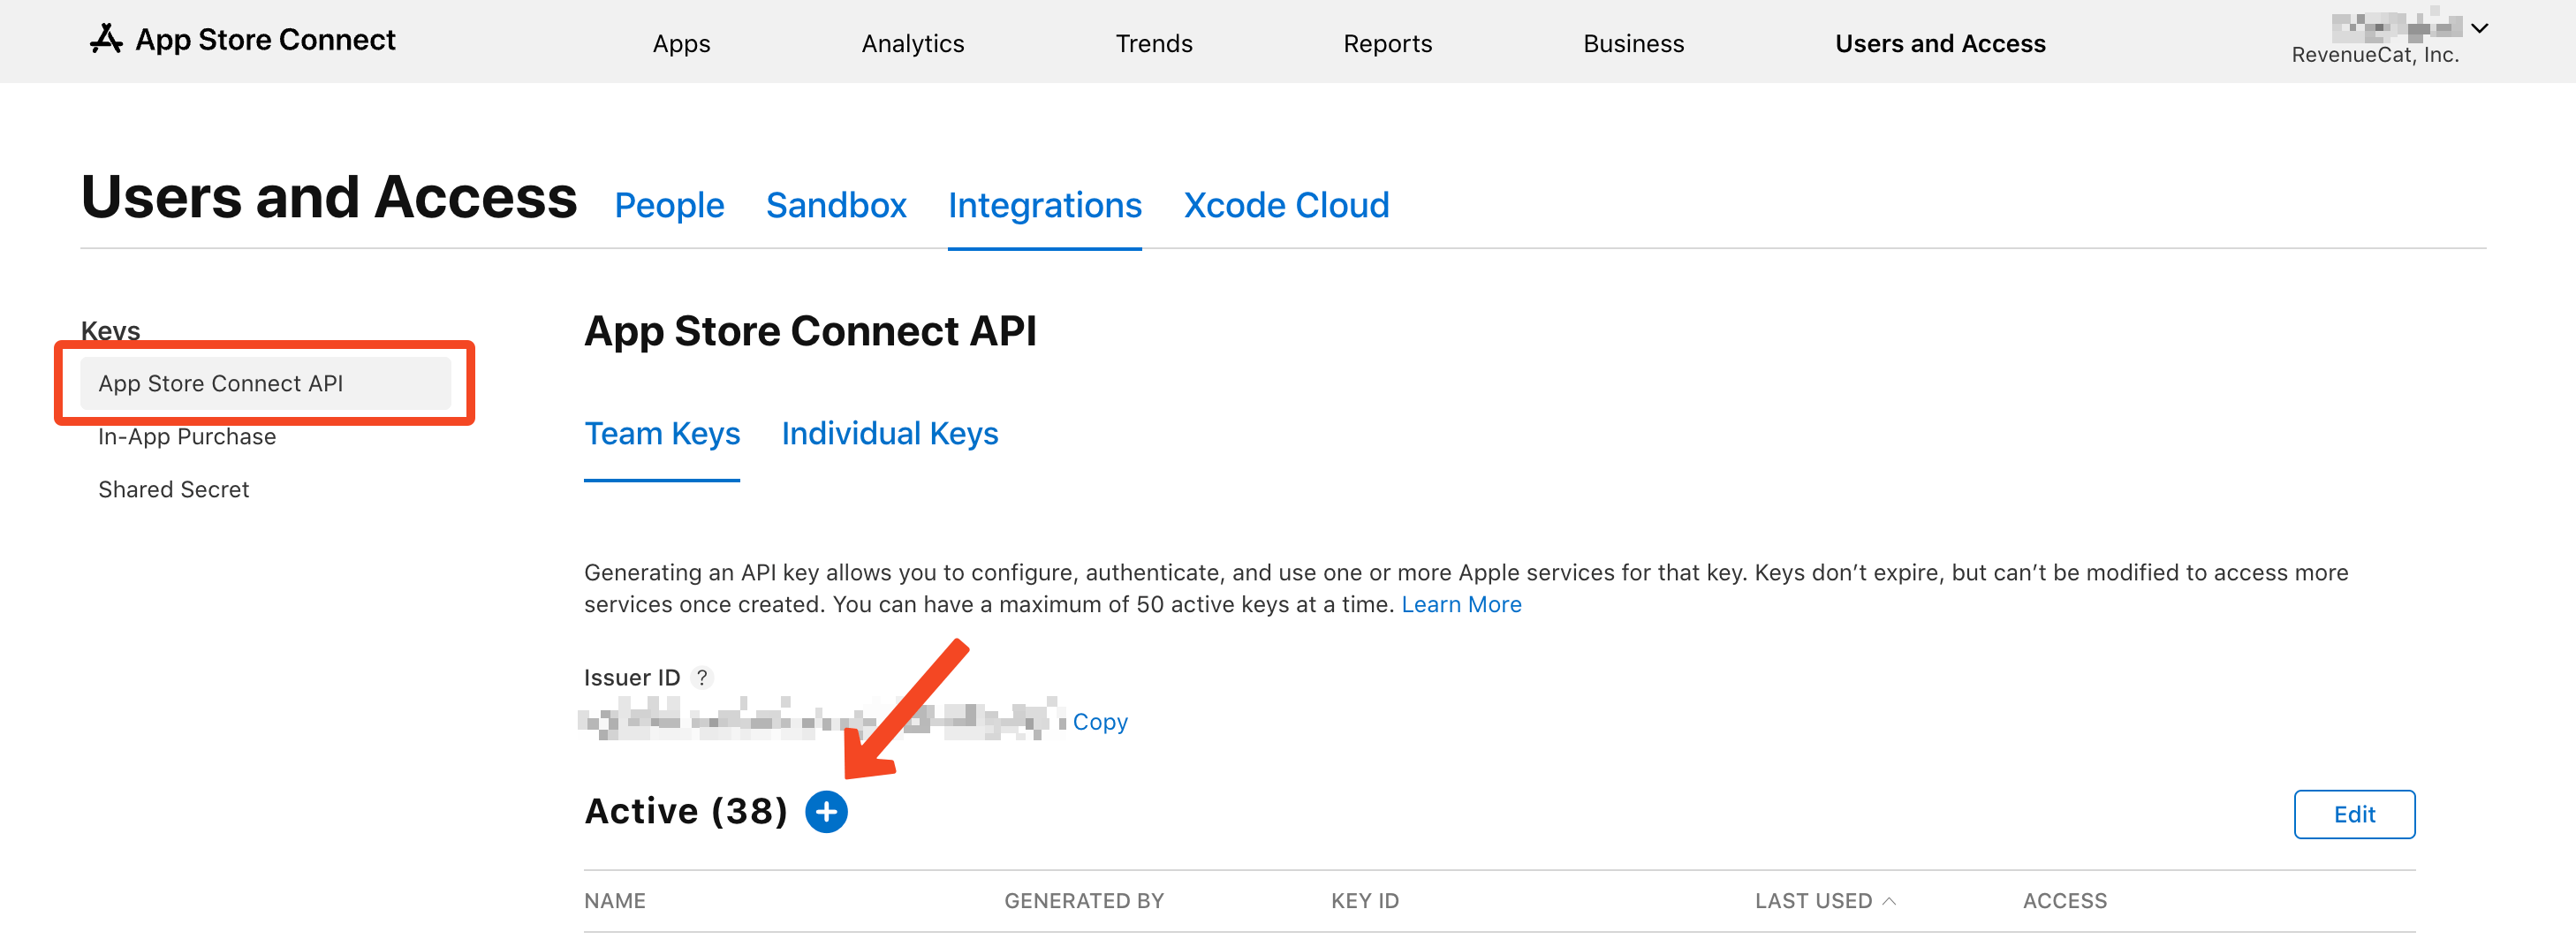
📍 App Store Connect → Users and Access → Integrations → App Store Connect API
- 1.Go to App Store Connect
- 2.Navigate to Users and Access → Integrations → App Store Connect API
- 3.Click the "+" button or "Generate API Key" to create a new key
- 4.Give your key a name (e.g., "whatsthe-app-access") and select the access level:
The key needs to have at least App Manager access level
- 5.Click "Generate" to create the key
Visual guide:
Important: Download immediately
The API key can only be downloaded once. Make sure you download the .p8 file immediately and store it in a safe location.
After creating the key:
- 1.Download the generated .p8 key file
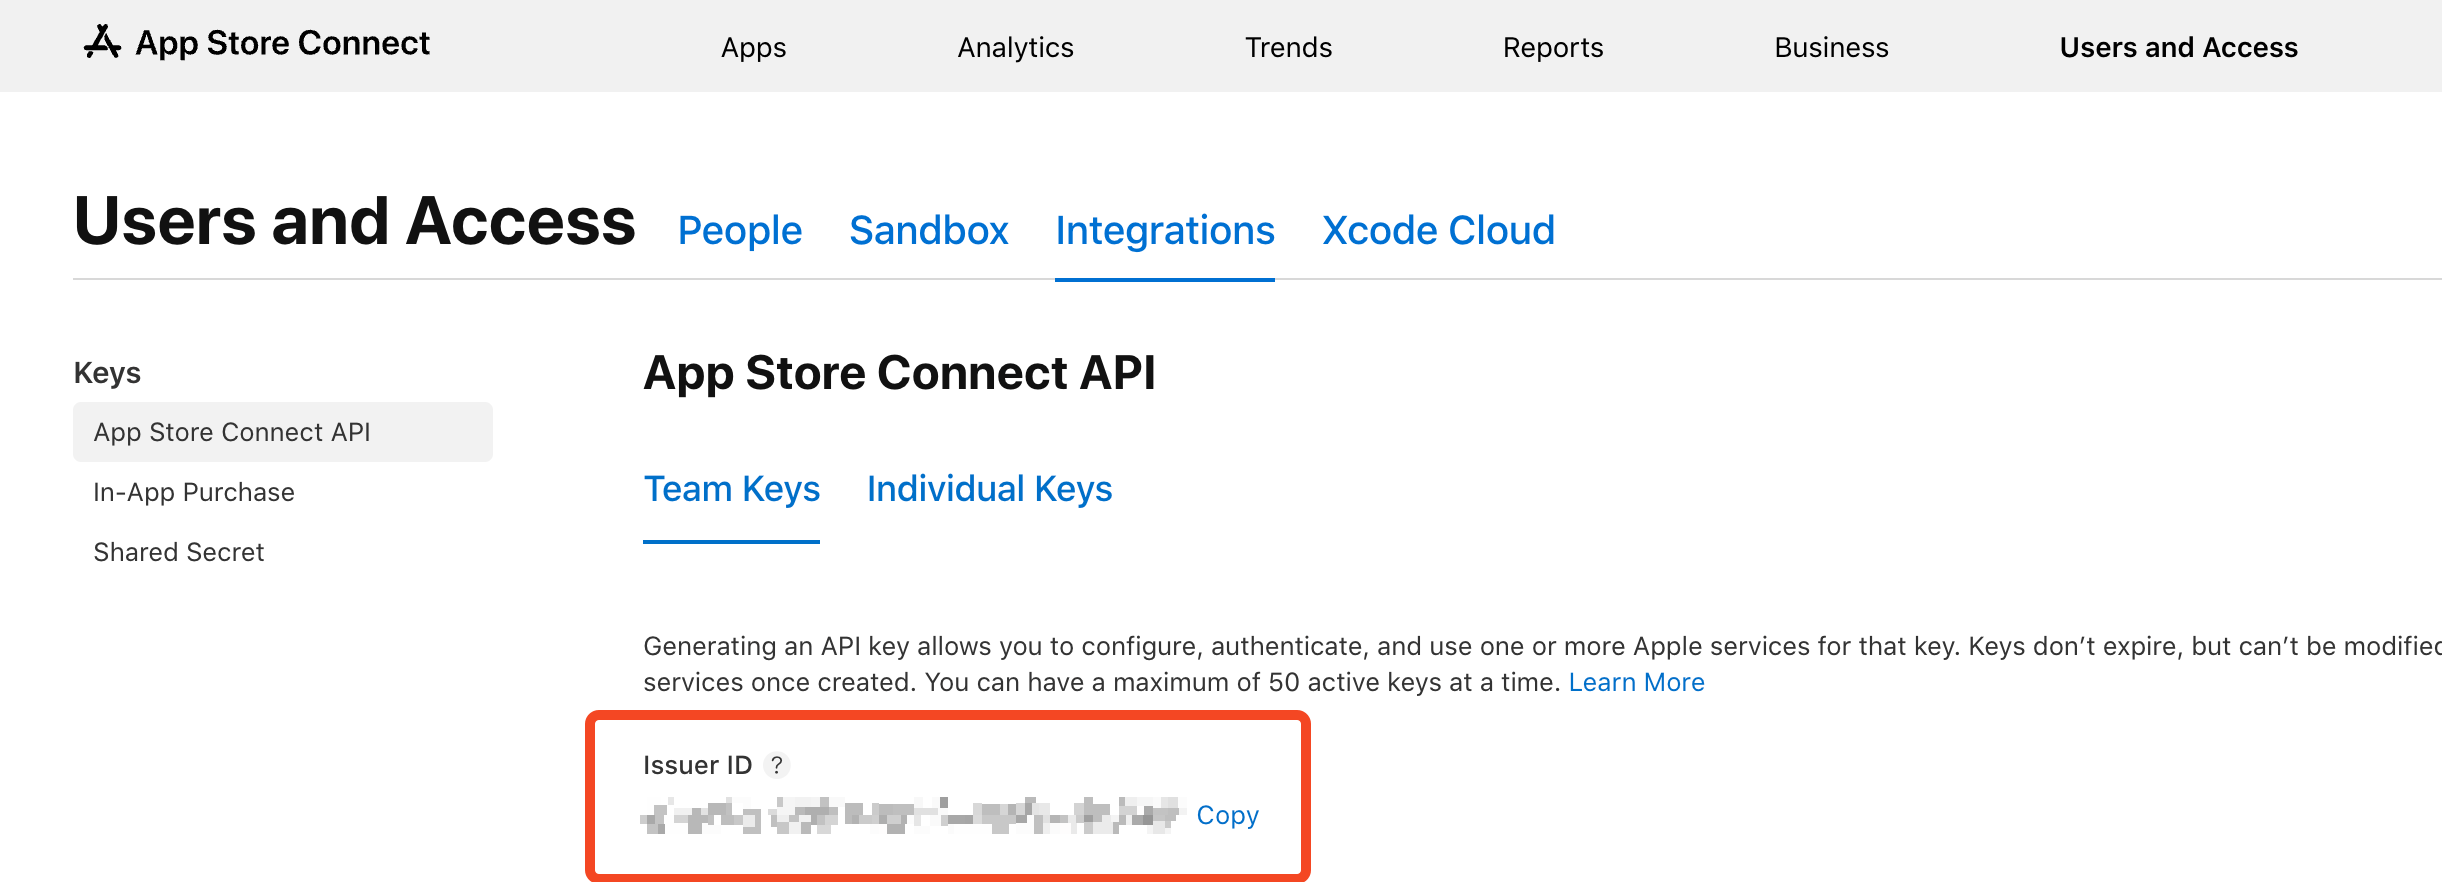
- 2.Take note of the Issuer ID shown above the "Active" table
- 3.Store both the .p8 file and Issuer ID securely - you'll need them in the next step
Visual guide:
Upload the API Key
Now you'll upload the .p8 key file and enter the required information into our system.
- 1.Go to your app connection page in our system
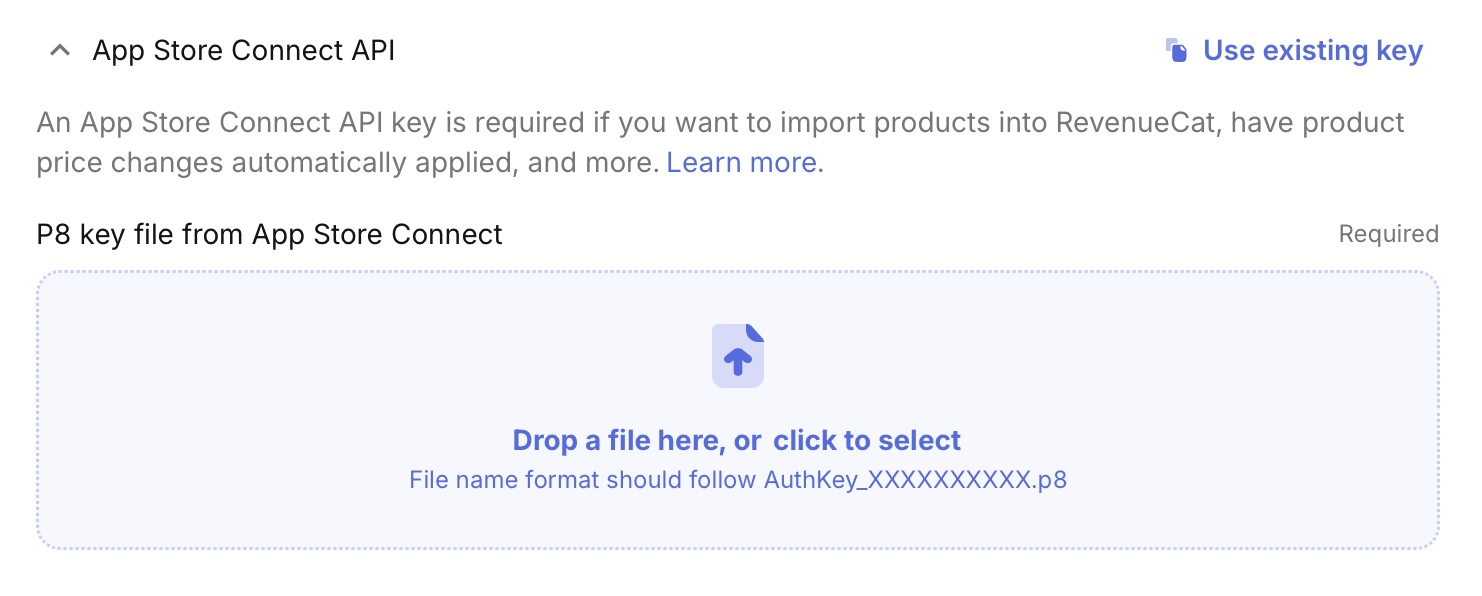
- 2.Find the section for App Store Connect API key upload
- 3.Upload the .p8 key file you downloaded in Step 1
Visual guide:
After uploading the .p8 file, you'll be prompted to enter:
Issuer ID
Enter the Issuer ID you noted down in Step 1 (shown above the "Active" table in App Store Connect).
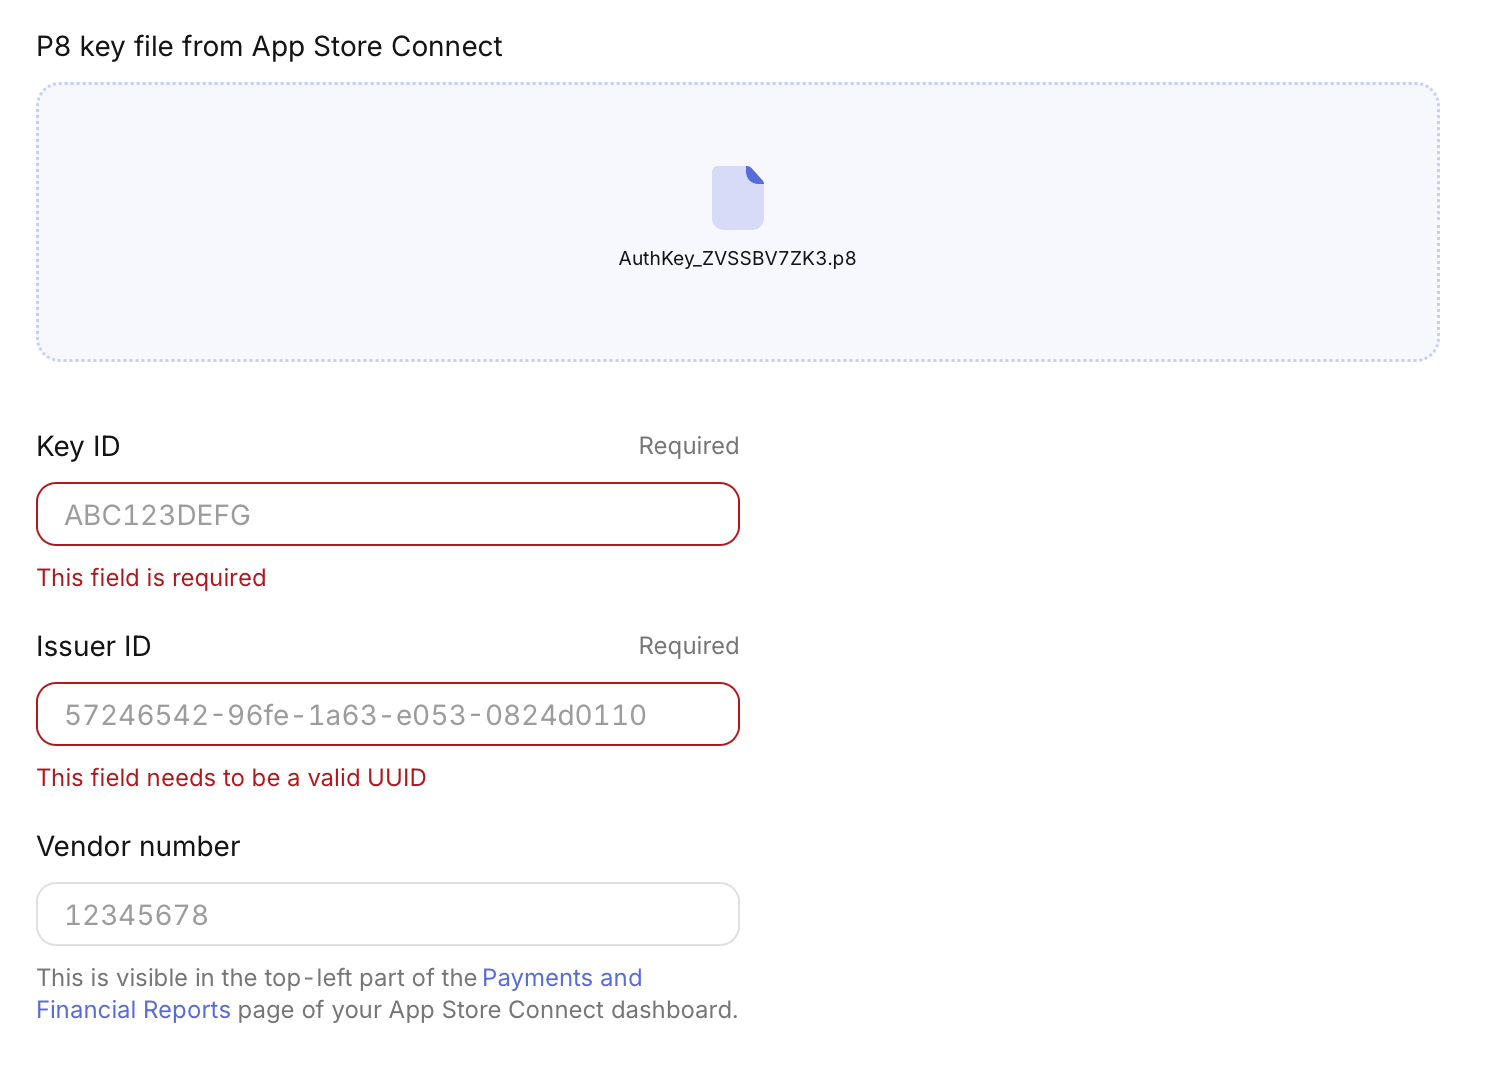
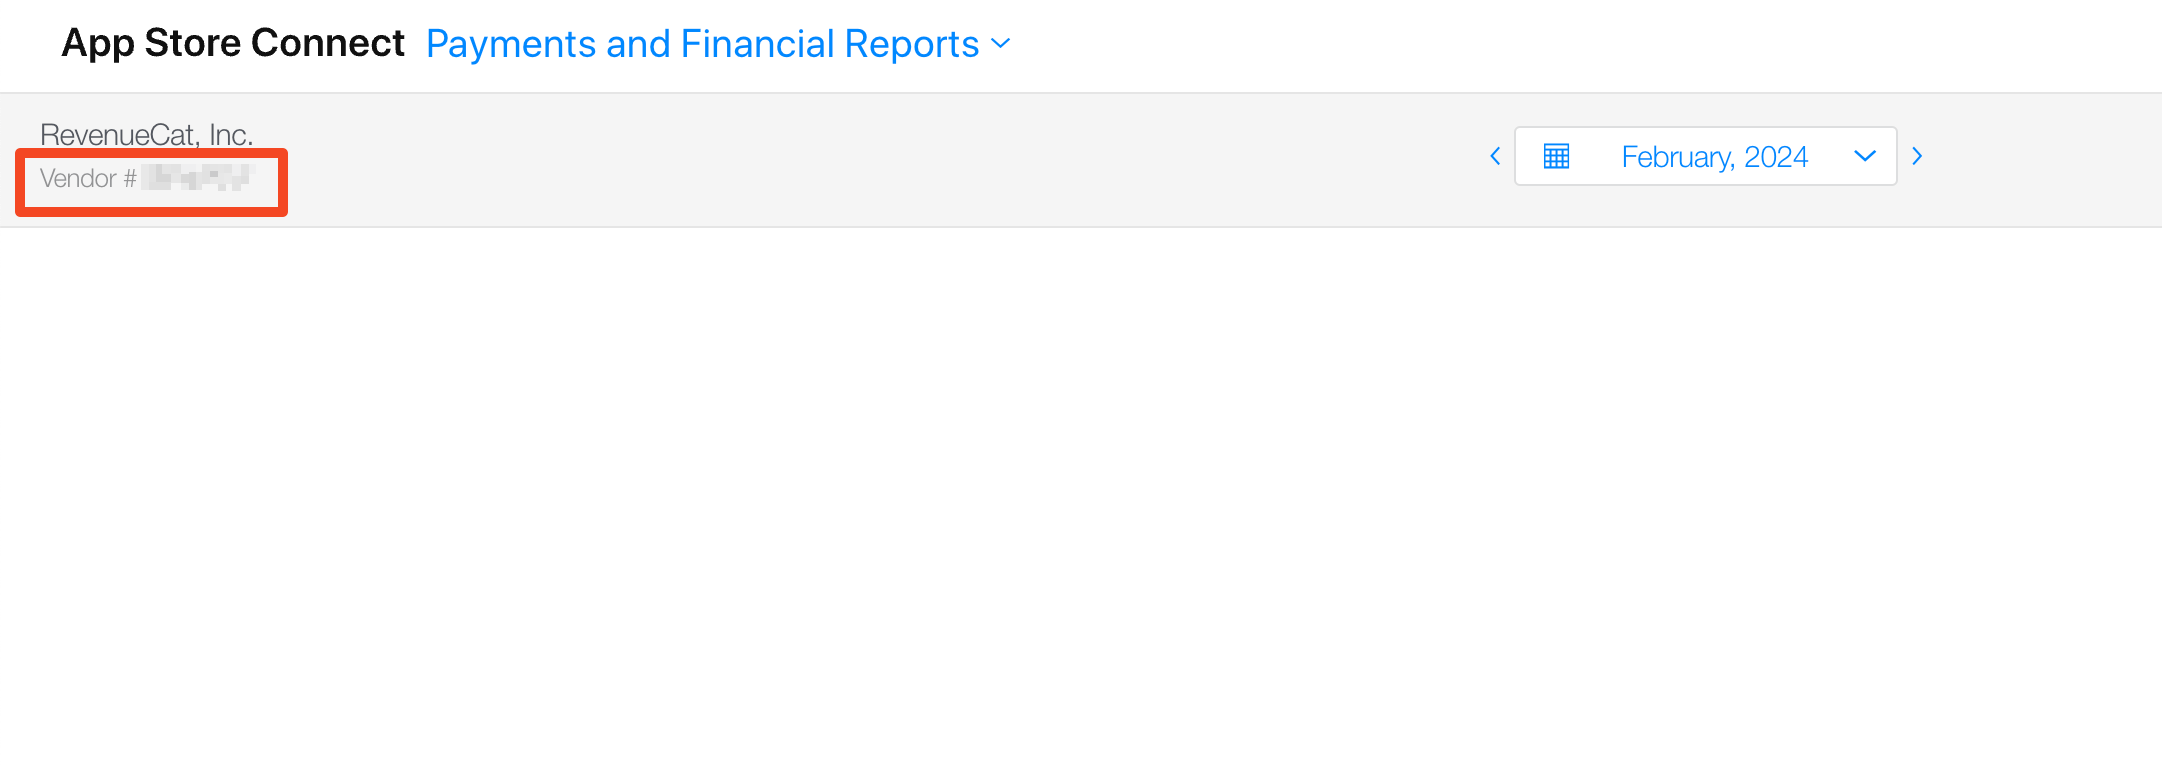
Vendor Number
Enter your Vendor number. This can be found in App Store Connect under Payments and Financial Reports, in the top left corner of the page.
📍 App Store Connect → Payments and Financial Reports (top left corner)
Don't forget to save!
After entering all the information, make sure to click "Save Changes" or "Connect" to complete the setup.
Important Notes
Credentials may take time to activate
After setting up your API key, it can take up to 24 hours for Apple to fully activate the credentials. If you see errors immediately after setup, wait a bit and try again.
What we access
We only access your financial reports and app information from App Store Connect. We cannot modify your app, change settings, or access any other data beyond what's needed to display your revenue metrics.
Security
Your API key (.p8 file) is encrypted and stored securely. Never share this key publicly or commit it to version control. If you accidentally expose it, delete the key in App Store Connect and create a new one.
Troubleshooting
"Invalid credentials" or "Permission denied"
- •Make sure your API key has at least App Manager access level
- •Verify the Issuer ID matches exactly what's shown in App Store Connect
- •Wait up to 24 hours for credentials to activate
- •Try re-uploading the .p8 key file
"Cannot find financial reports"
- •Make sure your API key has the correct access level
- •Your app needs to have generated at least one financial report (usually happens after your first sale)
- •Reports are generated monthly, so new apps may not have reports yet
"Invalid Vendor number"
- •Double-check the Vendor number in App Store Connect → Payments and Financial Reports
- •Make sure you're copying the entire Vendor number without any extra spaces
Still having trouble?
Make sure you've completed all steps above. If you're still experiencing issues after 24 hours, double-check that the Issuer ID and Vendor number match exactly what's shown in App Store Connect.